Foot Health Blog
Find expert articles from physical therapists and podiatrists to help understand, diagnose, and treat different foot health issues such as plantar fasciitis, bunions, flat feet, and more.
Flat feet7 Best Insoles for Flat Feet—Tested by Physical TherapistsInsoles can help relieve pain, redistribute pressure, and correct any malalignment in the leg due to different types of flat feet. However, because of the sheer number of insoles on the market, making a choice can be stressful. To help, we’ve narrowed down the list to include only the best types of insoles for flat feet.
Top 7 Flat Feet Insoles According to Physical Therapists
Overall Best: Upstep Flat Feet Custom OrthoticsBest for Standard Volume Shoes: Protalus T-100 InsolesBest for Sensitive Feet: URthotics Comfort+ InsolesBest for Loose-Fitting Shoes: SOLE Softec Ultra InsolesBest Budget: Tread Labs Pace InsolesBest Flexible: FitMyFoot Full-Length InsolesBest for Moderate-Fitting Shoes: Superfeet BLUE Insoles
1. Overall Best Insoles for Flat Feet
ProsCustom-made by top podiatristsAddresses your foot needs directly180-day money-back guaranteeFSA and HSA eligibleFree shipping and returnsConsShort waiting period before receiving orthotics
Upstep Flat Feet Custom Orthotics are easily the best and most effective custom orthotics for flat feet. They are designed specifically for you by expert podiatrists according to your footprint, to help with existing foot conditions and to fit your lifestyle. They also help maintain body alignment, control abnormal foot motion, and prevent injury during walking.
At Upstep, we put our customers first by guaranteeing satisfaction and providing flexible payment options. Our insoles are 100% risk-free and come with a 180-day money-back guarantee. You can make payments with your HSA and FSA cards or choose to make four interest-free payments using Klarna. Not to mention, we also offer free shipping and returns.
» Read the review: custom orthotics for flat feet
2. Best Flat Feet Insoles for Standard Volume Shoes
ProsAlign and support your bodyAvailable online and in-store90-day money-back guaranteeConsNot custom-madeLess perfect fitPossible insufficient supportFeet may slip around due to thinness
Protalus T-100 are full-length insoles for standard volume shoes such as dress shoes and casual shoes. These insoles align the body and support the entire foot, especially the subtalar joint, preventing excess foot motion. This alignment reduces stress on the ankles, knees, and hips.
Unlike Upstep Orthotics, Protalus insoles are available for sale in-store and online and are not custom-made. Consequently, they do not fit quite as well as Upstep's custom orthotics, making them less effective for flat feet. Because of the thinness of these insoles, feet may slip around while walking.
3. Best Flat Feet Insoles for Sensitive Feet
ProsCustom-madeComfortable for sensitive feetFSA and HSA eligibleConsNo interest-free installmentsComplicated paperworkRisk of error when completing paperworkBetter suited for other foot conditions
URthotics Comfort+ insoles are also custom-shaped to fit your foot and serve your exact needs. Ideally, they are best for those with sensitive feet and are particularly helpful for those with pain in the ball of the foot or metatarsals. They also provide extra comfort where that is the goal, but they are not very effective in managing discomfort caused by flat feet.
URthotics Comfort+ insoles do not allow interest-free installments, even though they cost as much as $159. However, they are purchasable with HSA and FSA cards. Also, you need to understand and articulate the foot condition clearly in the paperwork included with the foot impression kit, which can be a bit complicated for some who are not really familiar with all the little details in regard to their condition.
Our advice? Orthotics Comfort+ insoles are better suited for conditions other than flat feet.
4. Best Flat Feet Insoles for Loose-Fitting Shoes
ProsComfortableProvide shock absorptionPromote equal weight distributionConsNot custom-madeStiff arch supportIt can take longer to break inMolding process may cause imperfect fit
SOLE Softec insoles are made from a moldable EVA base and are ideal for conditions where cushioning and comfort are needed.
Softec insoles are not custom fitted and require molding using an oven for fitting. Alternatively, you can wear the footbeds for a few days to allow them to adapt to your feet but they do seem to take longer to break in. They are ideal for loose-fitting footwear and activities requiring maximum shock absorption. They also improve balance, reduce plantar fascia strain, and promote equal weight distribution on the feet.
For a store-bought insole, Softec insoles are fairly effective. However, these simply do not hold up compared to a custom insole that factors in foot pathology.
5. Best Budget Insoles for Flat Feet
ProsAffordableAvailable in multiple sizes and arch heightsGuaranteed to replace cracked or misshapen insolesConsNot custom-madeLess than perfect fitNot as durableProvide support but not cushioning
Tread Labs Pace Insoles are easily the most affordable store-bought insoles available. They come in multiple sizes and arch heights, allowing you to find as close a fit as possible. They are best for shoes with full-length removable inserts and work well for overpronators and those with plantar fasciitis.
Unfortunately, they do not produce the best results when used to manage flat feet since they don't allow for the perfect fit.
6. Best Flexible Insoles for Flat Feet
ProsCustom 3D printed insoleImprove alignment and stabilityFSA and HSA eligibleConsApp precisionCan't be trimmed to fit shoe sizeLimited 30-day return policyCustomer responsible for shipping
FitMyFoot insoles are easier to get than store-bought brands. You can measure your feet on their mobile app and have a 3D print of your insole sent to you.
FitMyFoot insoles are best for shoes with removable inserts like casual and athletic shoes. They reduce foot pain, improve body alignment and stability, and help your shoes fit better.
However, the brand's returns policy only honors returns within 30 days of purchase. Even then, the client will be responsible for the shipping costs.
7. Best Flat Feet Insoles for Moderate-Fitting Shoes
ProsComfortableAffordableDurable up to a yearConsNot custom-madeProvide medium arch supportBetter suited for everyday use, not flat feet
Superfeet BLUE are thin insoles that can replace removable sock liners in roomy to moderate-fitting shoes. They help to improve the overall fit and comfort provided by your shoes.
For an item that costs only $54.49, Superfeet BLUE insoles are durable, lasting up to a year. These insoles are made for everyday use and provide some arch support and shock absorption. However, they are not ideal for managing flat feet.
Ready to Step Up Your Comfort Game?
While all the above insoles will produce some results, Upstep insoles are the best for flat feet as they are custom-made by the top podiatrists and specifically designed to fit the wearer, allowing you to receive the exact support you need.
Upstep Flat Feet Custom Orthotics' custom fit, excellent quality, and craftsmanship provide the best value for money. It is my professional opinion that there is no going wrong with Upstep's Flat Feet Insoles.
Foot exercises5 Daily Exercises for Peripheral Neuropathy ReliefAre you among the 20 million Americans dealing with peripheral neuropathy? If so, you're all too familiar with the muscle weakness, coordination issues, and abnormal sensations it can cause in the hands and feet. While there's no definitive cure, you can still take steps to manage symptoms and improve your quality of life.
The impact of this condition is considerable: individuals often experience abnormal sensations in their hands and feet, muscle weakness, and difficulty coordinating movements. While there is currently no definitive cure for peripheral neuropathy, there are numerous ways to manage its symptoms and improve quality of life. These include medication, lifestyle changes, physical therapy, and—perhaps surprisingly—daily exercises.
Let's explore five daily exercises for foot neuropathy that can provide relief from the symptoms of peripheral neuropathy.
5 Exercises for Peripheral Neuropathy
Calf RaisesChair SquatsSeated Hamstring StretchSide Leg RaisePlantar Fascia Stretch
1. Calf Raises
Calf raises may seem simple, but they can be very effective at relieving the symptoms of peripheral neuropathy. By lifting the heel off the ground, you engage and strengthen the calf muscles. This action improves blood flow to the feet, a critical aspect for individuals with peripheral neuropathy who often experience reduced circulation. Additionally, calf raises can enhance balance and stability, aiding those struggling with coordination issues due to nerve damage.
Performing calf raises is straightforward and can be done almost anywhere. Stand with your feet hip-distance apart, slowly lift your heels off the ground while keeping your toes planted, and then lower yourself back down. Aim for ten to fifteen repetitions, increasing the number as you become more comfortable.
Did You Know?Peripheral neuropathy refers to the range of conditions that occur when the peripheral nervous system—the network of nerves outside the brain and spinal cord—is damaged.
» Learn more about Baxter's nerve entrapment
2. Chair Squats
Chair squats are a low-impact exercise that targets the leg muscles, promoting better balance and increased circulation. With regular practice, these exercises can mitigate the impact of muscle weakness often seen in peripheral neuropathy.
Stand in front of a chair, facing away from it while your feet are shoulder-width apart and your toes are pointing straight ahead.Bend your knees by engaging your core. Ensure your spine remains neutrally aligned.Tap the chair with your butt, but do not sit down. Lift your arms out in front if you need extra balance.Squeeze your glutes and hamstrings to drive your hips forward and up, and return to the starting position.Repeat the squat about five times, gradually increasing the number of repetitions as you become more comfortable.
3. Seated Hamstring Stretch
The seated hamstring stretch is an excellent exercise for reducing tension and increasing flexibility in your legs—crucial for preventing potential injuries from lack of coordination or muscle weakness caused by peripheral neuropathy.
Sit on the edge of a chair with your back straight and your feet flat on the ground.Extend one leg out in front of you with your heel on the ground and your toes pointing upward.Bend your other leg so the sole of your foot rests against your mid-thigh.Slowly lean forward from your hips, keeping your back straight, and reach your hands towards your toes. Hold this position for 30 to 60 seconds, feeling the stretch in the back of your thigh. Repeat it 2- 3 times per day.
Did You Know?Peripheral neuropathy can come about due to numerous factors, including diabetes, autoimmune diseases, infections, exposure to toxins, and certain medications
4. Side Leg Raise
Side leg raises target the muscles of the hips and outer thighs, which play a significant role in maintaining balance and stability. For those experiencing coordination issues due to peripheral neuropathy, this exercise can be invaluable.
To perform side leg raises, lie on your side on an exercise mat and lift your top leg to a 45-degree angle, hold for a few seconds, then lower your leg. Repeat this on the other side, alternating for several repetitions.
5. Plantar Fascia Stretch
A crucial aspect of managing peripheral neuropathy symptoms is improving blood flow. The plantar fascia stretch does just that, targeting the foot's arch and thereby improving circulation.
Sit on the floor or on a mat and extend your leg so that only your heel is on the floor.Bend down, hold your big toe, and attempt to bend it backward. Flex your ankle up so that it pulls away from the floor, and hold this position for 30 to 60 seconds. Repeat the exercise on the foot two to four times, gradually increasing the duration and intensity as you become more comfortable.
Listen to Your BodyRemember, everyone’s body is different. When exercising, it’s essential to listen to your body and modify movements as necessary. If you feel any pain or discomfort during an exercise, stop and consult with your healthcare provider or a fitness professional. They can help modify the exercise to suit your needs and ensure you're performing it correctly to avoid injury.
» Here's how you can strengthen your ankles to prevent further injury
Beyond Exercise
Exercises serve as a powerful tool for managing peripheral neuropathy. These five activities—calf raises, chair squats, seated hamstring stretches, side leg raises, and plantar fascia stretches—can lead to significant improvements in your flexibility, strength, balance, and circulation, reducing the risk of injury.
Supplementing your exercise regimen with custom orthotics can provide additional support. Consider products like Upstep Normal Everyday Activity Custom Orthotics, which are specifically designed for individuals with peripheral neuropathy. They offer shock absorption, enhanced stability, and improved comfort.
» Check out these treatments for reversible neuropathy
A Proactive Approach
Living with peripheral neuropathy is challenging, but remember, you have tools at your disposal. Through a blend of daily exercises and supportive aids like custom orthotics, you can manage your peripheral neuropathy symptoms effectively and lead a fulfilling life with minimal discomfort. The key lies in taking a proactive approach to manage your condition.
Foot painExercising with Stress Fractures in the Foot: Dos and Don'tsDid you know that stress fractures account for over 10% of all injuries in sports medicine? These tiny, painful cracks in the bones pose a unique challenge to maintaining an active lifestyle. For those bravely facing this hurdle, we've got your back.
Let's dive into understanding stress fractures and exploring how you can remain active without worsening your condition.
Understanding Stress Fractures
Stress fractures are micro-cracks in your bones, often resulting from repetitive force activities, such as jumping or long-distance running. They are most commonly found in the lower leg or foot, resulting in painful swelling that can make even routine tasks like walking a test of endurance. But what exactly causes these fractures? It boils down to overuse, muscle tightness, and weakness. A sudden surge in activity duration or intensity also ups the risk of developing stress fractures.
» Learn about the possible causes of forefoot pain
Recovery Timeline and Precautions
Typically, a foot stress fracture will have you on a recovery path for around 6-8 weeks. During this period, you'll need to tread lightly to prevent further injury. But don't worry—staying active and nursing your fracture aren't mutually exclusive. Let's explore some safe exercises and those you're better off avoiding during recovery.
Vitamin D and Calcium: Key to Bone HealthDid you know that adequate Vitamin D and Calcium intake is essential for bone health? These nutrients help your bones to heal faster from stress fractures. Incorporating foods rich in Vitamin D (like fatty fish, fortified dairy products, and egg yolks) and Calcium (like dairy products, green leafy vegetables, and tofu) into your diet can aid recovery.
» Struggling with flat feet? Check out the best insoles for that condition
How to Exercise with a Stress Fracture?
Exercising with stress fractures requires caution. Aim for activities that sidestep exerting stress on your lower legs (especially repetitive impact), and consult your doctor before introducing any new exercise routine. Always prioritize comfort and safety. If you feel any discomfort or pain, it's time to hit the brakes.
Cycling: A Low-Impact Solution
Cycling, particularly stationary cycling, is a great way to maintain fitness when dealing with a foot stress fracture. This low-impact activity ensures you aren't further straining your foot. If you're experiencing severe pain, a walking boot can offer added support. Remember, start slow and gradually increase your intensity to ensure safety.
Swimming: Let Water Aid Your Recovery
Swimming and other water exercises are excellent low-impact choices for those with foot stress fractures. Performing your exercise routine in water alleviates weight from your lower legs while providing resistance, giving you a solid workout without worsening your injury. From swimming for cardiovascular fitness to water-based strength training, the pool can be your best friend during recovery.
Lifting Weights: Strengthening More Than Legs
While recovering from a stress fracture, seated weightlifting exercises can help keep you in shape and allow you to work your upper body muscles, all while sparing your affected lower leg. This approach ensures that you continue to strengthen your body without risking further injury. Be careful to avoid exercises that could put unnecessary pressure on your lower leg. As with any exercise regimen, stop immediately if you feel discomfort or pain.
Activities to Avoid with a Stress Fracture
While recovering, aim to limit activities that increase the load on your lower leg. Walking and running are top culprits to avoid as they might hinder healing or even reopen a partially healed fracture. Crutches can be a practical solution to minimize weight-bearing during this time.
Did You Know?Stress fractures often heal without any visible signs. The pain may decrease long before the fracture has fully healed. Just because the pain has diminished doesn't mean you can return to high-impact activities. Always follow your healthcare provider's advice.
Leveraging Orthotics for Prevention
Orthotics, like the ones offered by Upstep, can be your trusty sidekick in preventing stress fractures. How? They absorb shock and lessen the impact of repetitive force on your feet. Upstep’s custom orthotics are designed to provide the support and cushioning your feet need. They prevent foot pronation, a known risk factor for medial stress syndrome, allowing you to push your limits without the fear of shin pain.
Your Route to Healthier Training
High-quality custom orthotics from Upstep are tailored to meet your unique needs. With their shock-absorbing capabilities, you can train longer, harder, and smarter. They are a valuable addition to anyone's arsenal, whether you're looking to prevent stress fractures or recover from them.
Don't let stress fractures keep you on the sidelines. Enhance your training, protect your feet, and step up your game with Upstep's custom orthotics. Take the first step towards a pain-free life—try Upstep's custom orthotics today!
Foot painEasy and Effective Ways to Treat a Sprained FootA sprained foot is an all-too-common inconvenience that results from the stretching or tearing of ligaments around your foot. Often caused by an ankle twist, fall, or any forceful impact that twists your foot in an unnatural way, this injury spares no one, affecting individuals of all ages.
Let's first understand what puts you at risk for a foot sprain.
Foot Sprain Risk Factors
Injury risks elevate with involvement in high-impact sports, being overweight, prior ankle injuries, or possessing weak muscles in your feet or legs. Improper footwear can also significantly contribute to the risk. Symptoms of a sprained foot range from pain, swelling, and bruising to difficulty walking. Severe cases may involve weight-bearing challenges on the affected foot.
» Protect your feet from sprains on long walks with best insoles for hiking boots
Preventing Foot Sprains
Prevention is always better than cure. Here are some measures you can take to avoid foot injuries:
Warm-up: An essential prelude to any physical activity, warming up prepares your muscles for action, enhances flexibility and range of motion, and reduces injury risks. While stretching, avoid any movements that cause pain to your foot or ankle.Wear the Right Shoes: Footwear is not just about fashion; it's about foot health. Always ensure your shoes fit well and offer the right support. Additionally, the shoe's sole should match the surface of your activity to prevent slips and falls.Maintain Proper Form and Technique: Whether it's running, jumping, landing, or even diving, the correct form and technique can minimize injury risk by reducing stress on your feet and ankles.Custom Orthotics: These specialized inserts provide additional support and cushioning to your feet. Designed to correct any structural issues contributing to your risk of foot sprains, orthotics help redistribute pressure evenly across your feet. Consider using Upstep Normal Everyday Activity Custom Orthotics that are tailored to your unique foot shape and specific foot concerns.
» Did you know that arch supports can be great for your feet and ankles?
Sprained Foot Treatment at Home
While the severity of the sprain influences the healing time, the right treatment can expedite the recovery process. Mild sprains may heal within a week or two, while severe ones might take several weeks. Here are some home remedies to help you manage your symptoms:
Rest: Cease any physical activities causing pain, swelling, or discomfort. This rest period helps prevent further ligament damage and promotes healing.Icing: Ice can effectively reduce pain and swelling when applied within the first seventy-two hours post-injury. Ensure to wrap the ice in a towel or cloth before applying it to your foot for 20 minutes, repeating 2-3 times daily. Direct application of ice on the skin can lead to frostbite.Elevation: Raising your foot above your heart level can help drain excess fluid from the injury site, reducing pain and speeding up recovery.Medication: Over-the-counter pain medications like acetaminophen or ibuprofen can aid in pain management and inflammation reduction.
If at-home treatments don't alleviate your symptoms, consider seeking medical attention. Healthcare providers may recommend physical therapy, brace or crutches for support during the healing phase, and in some situations, surgical repair of damaged ligaments might be necessary.
Step Confidently Towards a Sprain-Free Future
Sprained foot injuries are not just painful, they can significantly disrupt your daily activities. From incorporating preventative measures to using customized orthotics like Upstep, you can mitigate these injuries and promote optimal foot health.
Alongside other treatment modalities, the right footwear and orthotics can help you take confident steps towards pain-free feet and a return to your favorite activities. Order your custom orthotics today and take a stride towards healthier feet.
Joint issues4 Exercises to Combat Big Toe Arthritis (Hallux Rigidus)Living with hallux rigidus, more commonly known as big toe arthritis, can be challenging. This common condition targets the joint at the base of your big toe, causing discomfort, stiffness, and reduced mobility. As a degenerative joint disease, it stems from the wear and tear of the metatarsophalangeal (MTP) joint cartilage, which can result in bone-on-bone friction and inflammation. It's often seen in women, middle-aged or older people, and those with a family history of the condition.
But fear not—hallux rigidus, while painful and debilitating, is treatable. Rest, physical therapy, and custom orthotics are some conservative measures for managing this condition. In addition, regular exercise can be incredibly beneficial in reducing further joint damage. Here are four exercises that can help you regain strength and mobility in your big toe.
4 Exercises for Big Toe Arthritis
Toe SplayToe PullsHallux Flexion And ExtensionTowel Curls
1. Improve Flexibility with Toe Splay
Toe splay is an easy yet effective exercise to improve flexibility and strength in your toes, including the big toe affected by hallux rigidus. Stretching the muscles and ligaments in your foot can reduce stiffness and pain in the joint, enhance your balance and foot stability, and lessen the risk of future injury.
How to do it: Sit on a chair or the edge of a bed with your feet flat on the ground and your back straight. Then, spread your toes apart as far as you can comfortably manage, hold the position for about five seconds, then relax. Repeat this exercise several times, gradually increasing the duration and frequency as your foot becomes more flexible. You can add a challenge by placing a towel or small ball between your toes and squeezing it gently.
Did You Know?Hallux rigidus may be genetic, or it can develop from repetitive stress, joint trauma, structural factors, and inflammatory foot conditions. If you're experiencing pain, stiffness, swelling, and tenderness around the MTP joint, these could be symptoms of hallux rigidus. In severe cases, the joint may become deformed.
» Find out if walking is good for foot arthritis
2. Strengthen Muscles with Toe Pulls
Also known as towel pulls, this exercise can improve the strength and flexibility of your toes. It stretches the muscles and tendons in your foot, reducing stiffness and enhancing mobility in the affected joint. Plus, it can improve your foot's overall stability to help prevent further injury.
How to do it: Place a towel or small cloth under your foot while sitting with your feet flat on the ground. Use your toes to pull the towel towards you, curling your toes as you do. Hold for a few seconds, then release and repeat. For added resistance, you can place a weight or object on top of the towel.
» Learn about the possible causes of midfoot pain
3. Enhance Range of Motion with Hallux Flexion and Extension
The hallux flexion and extension exercise can boost the flexibility and range of motion of the affected big toe. It stretches the muscles, tendons, and ligaments in your foot, reducing joint stiffness and pain while enhancing foot strength and stability.
How to do it: Bend the big toe towards or away from the sole, then stretch it into both flexion and extension using a hand or an exercise band. While the normal range of motion for big toe extension is approximately 70 degrees, and for flexion, it's approximately 45 degrees, try to reach these ranges of motion as your comfort allows. Hold each position for a few seconds before releasing. Remember to perform this exercise gently to prevent exacerbating the condition.
» Spend a lot of time on your feet? Check out the best insoles for walking all day
4. Boost Balance and Stability with Towel Curls
Also known as scrunches, towel curls are designed to improve the strength and flexibility of your big toe. They stretch and strengthen your foot's muscles and tendons and improve your balance and foot stability.
How to do it: Place a small towel under your toes and use your toes to grip the towel, scrunching it towards you and then pushing it away. Hold for a few seconds, then release. For an added challenge, place an object on the towel to increase the scrunching effort.
ReminderAlways start any new exercise regimen slowly and gently, and remember to listen to your body. If any exercise causes pain, stop and consult with a healthcare professional.
Marching Towards a Pain-Free Future
Managing hallux rigidus isn't just about managing pain—it's about regaining your foot's strength and flexibility. Regular exercise, including toe splay, toe pulls, hallux flexion and extension, and towel curls, can help reduce joint pain and stiffness and improve overall foot health.
But why stop there? Augment your progress with Upstep's custom insoles designed specifically for hallux rigidus. The Upstep Normal Everyday Activity insoles provide targeted cushioning and support to your affected joint, reducing pressure and discomfort and allowing you to enjoy your daily activities with less pain.
TreatmentsStop Your Walking Posture From Hurting YouHave you ever considered how your walking style might be affecting your health? The truth is, the way we walk, or our gait, plays a significant role in our overall well-being. An improper alignment of the body while walking, often referred to as poor walking posture, can lead to a myriad of health issues, including muscle imbalances, joint pain, and postural misalignment.
Identifying the Signs of Poor Walking Posture
Poor walking posture can be a result of various factors such as sedentary lifestyles, weak core muscles, improper footwear, or past injuries. Common signs include rounded shoulders, forward head position, uneven weight distribution, excessive arm swinging, and dragging or shuffling feet. If you're experiencing discomfort like lower back pain, knee pain, or foot pain while walking, it's time to take a closer look at your posture.
Did You Know?Your walking speed can influence your posture. Walking too fast can cause you to lean forward, while walking too slowly can lead to slouching."
» Check out our selection of the best insoles for walking all day
Why Is Your Gait Important
Your gait, or the way you walk, is a crucial factor in maintaining a healthy walking posture. The gait cycle describes the cyclic pattern of movement that occurs during walking. It consists of two phases: the stance phase and the swing phase.
The stance phase constitutes approximately 60% of the total gait cycle. It begins when your foot first touches the ground and ends when the same foot leaves the ground.The swing phase makes up around 40% of the gait cycle. It begins when the foot first leaves the ground and ends when the same foot touches the ground again.
A walking gait analysis can help identify any asymmetries or unique movements that may be causing discomfort. Addressing these issues promptly is essential to prevent them from worsening over time and leading to serious complications.
Improve Your Walking Posture
Ready to improve your walking posture? Here are some practical tips to help you achieve a more comfortable and healthier walking experience:
Choose the Right Footwear: Shoes with inadequate arch support can strain your knees, back, and neck. Opt for shoes with lower heels and a spacious toe-box for everyday wear. They help maintain neutral foot alignment and reduce discomfort.Incorporate Exercise into Your Routine: Stability, strengthening, and core training exercises, along with specific physiotherapy exercises, can enhance your stability and correct posture. Strengthening exercises target the muscles of the legs, core, and back, enabling them to better support your body.Consider Using Insoles: Insoles can correct abnormal walking patterns by aligning the feet in a normal position during standing, walking, or running. They also improve gait symmetry and provide additional support and cushioning.Take smaller steps: A longer stride length can throw you off balance and affect your walking posture. Taking shorter, controlled steps allows for better balance and stability and reduces the impact on your joints.Engage your arms: Proper arm movement is a part of good posture. Bend your elbows at a 90-degree angle and allow your arms to swing naturally. This should coordinate with the opposite leg swing, helping to maintain balance and rhythm.
Quick Tip: Try to keep your head up and look forward while walking. This simple adjustment can help align your neck and spine, improving your walking posture.
» Is Morton's neuroma giving you trouble? Check out the exercises that can alleviate foot pain
The Path to Pain-Free Walking
Improving your walking posture is essential for maintaining overall musculoskeletal health. By making these changes, you can enhance your walking posture and reduce discomfort. Custom orthotics, such as those offered by Upstep, can provide an ideal way to ease pain while walking.
Don't let pain hinder your enjoyment and mobility. Take the first step towards pain-free walking and improved posture with Upstep's custom orthotics today!
Arch7 Best Cycling Shoe Insoles to Provide Arch SupportCompared to standard running insoles, cycling shoe insoles offer superior arch support, metatarsal padding, and deep heel cups, reducing foot strain during cycling. With the wrong insole, you risk underperforming and developing musculoskeletal problems that may hinder your cycling in the future.
Choosing the right insole can help you avoid this. That’s why we’ve sifted through the market to help you identify the best insoles for your cycling shoes. Here are our top seven picks and why they qualify.
» Will cycling orthotics help your performance? See the benefits of cycling orthotics
Top 7 Insoles for Cycling Shoes with Arch Support
Best Overall Cycling Insoles: Upstep Cycling Custom OrthoticsBest Firm Fit Insoles: Tread Labs Lael WilcoxBest for Comfort Insoles: Superfeet TrailblazerBest Cork Insoles: SOLE Performance MediumBest Thin Insoles: Protalus T-100 EliteBest Shock-Absorbing Insoles: URthotics Sports Best Foam Insoles: FitMyFoot Red Hexagon
1. Best Overall Cycling Insoles
ProsCustom-made by top podiatristsOptimal support and cushioning180-day money-back guaranteeFSA and HSA eligibleFree shipping and returnsConsShort waiting period before receiving orthotics
When it comes to finding the best insoles for cycling, Upstep is the clear winner. Their custom cycling insoles are made with the highest quality and most durable materials, providing optimal support and cushioning during cycling. But what sets Upstep apart from the rest is its commitment to affordability. These insoles are reasonably priced, making them an excellent choice for cycling enthusiasts on a budget.
What's more, Upstep offers a 100% money-back guarantee on their product for 120 days, with free shipping and returns. And for those who have a Health Savings Account (HSA) or Flexible Spending Account (FSA), Upstep insoles are eligible for reimbursement, making them an even more attractive option for those looking for quality and affordability. With Upstep, you can be sure that you're getting the best cycling insoles for your money.
2. Best Firm Cycling Shoe Insoles
ProsMade from carbon fiber Firm arch supportThin ventilated top coverConsNot customizedDifferent arch heights Narrow heel fitShipping fees are not included
For cyclists who prioritize firm arch support, Tread Labs Lael Wilcox insoles are an excellent option. These insoles are crafted from 100% carbon fiber arch support, making them incredibly rigid and efficient at returning energy during each pedal stroke.
Ideal for cycling shoes with thin or no inserts, Tread Labs offers four different arch heights to accommodate varying support requirements. While they may not offer a perfect fit for all users since they're one-size-fits-all insoles, they are still a viable choice for cyclists seeking high-quality arch support in their cycling shoes.
» Read more: explore the best cycling shoes for flat feet
3. Best Comfort Insoles for Cycling Shoes
ProsWide forefoot designDeep heel cup60-day money-back guaranteeConsMade for medium to high arch heightNeed to trim insole to fit shoeTakes up a lot of space in shoesNot custom-made
The Superfeet Trailblazer insoles are an excellent choice for cyclists experiencing back and hip pain. These insoles have been designed to improve power transfer and reduce internal knee rotation, which can alleviate discomfort in the hip and lower back. The wide forefoot and deep heel cup are also ideal for those with wider cycling shoes.
While these insoles do not have a specific arch height in mind, they can still provide overall comfort and support to the foot during cycling. It's worth noting that these insoles may not be suitable for those with specific foot problems requiring customized arch support.
4. Best Cork Insoles for Cycling Shoes
ProsMade with ReCORK recycled wine corksShock absorbingMoldable orthopedic baseConsTakes time to get the perfect fitBest suited for medium-fitting shoesMust be trimmed to fit shoesMedium cushioning
SOLE performance medium insoles are an eco-friendly option made from recycled wine corks, which offer excellent shock absorption for cycling shoes. These insoles come with metatarsal pads that improve forefoot comfort, making them an ideal choice for cyclists who experience discomfort in this area.
However, wear-moldable design means they may take some time to adjust to the shape of your feet, unlike custom-made orthotics that offer immediate support and comfort. Overall, these cork insoles are a great option for cyclists looking for an environmentally-friendly and shock-absorbing solution for their cycling shoes.
5. Best Thin Insoles for Cycling Shoes
ProsDifferent sizes availableThinner than other insolesMoisture-wicking materialsConsDifficulty fitting to shoeTrimming may impact performanceNot custom-madeHigher heel arching
The Protalus T-100 Elite insoles are designed specifically for low-volume cycling shoes with removable inserts and provide excellent arch support with a thin and lightweight design. These insoles are available in various sizes, making it easier for users to find a perfect fit.
Protalus insoles offer both cushioning and alignment support to help reduce foot fatigue and discomfort during long rides. However, due to their slim profile, these insoles may not fit perfectly in all shoes, even with trimming, which may impact their effectiveness as cycling insoles.
6. Best Shock-Absorbing Insoles for Cycling Shoes
ProsCustom-made orthoticsFSA and HSA eligibleLightweight and durableConsMore expensive than alternativesLonger waiting periodThicker insole base
URthotics Active Insoles are a top choice for cycling enthusiasts who desire shock absorption and durability. These insoles are designed with custom arch support that follows the natural contours of your foot, providing excellent comfort and stability. The top layer of the insole is made from high-quality EVA material, which is known for its durability and long-lasting performance. The deep heel cup design maximizes protection and helps to alleviate pain.
Although these insoles are pricier than some other options on the market, they are eligible for HSA and FSA plans, making them a great investment for those looking for a durable and effective cycling insole.
7. Best Foam Insoles for Cycling Shoes
ProsPrevents foot and leg fatigueMade through 3D technologyImproves body alignmentConsNot specifically made for cyclingSmooth insole coveringCannot be trimmed to fit shoeMore costly than alternatives
FitMyFoot's Custom Arch Support Insoles are one of the best foam insoles for cycling shoes, specifically designed for athletic use. These insoles are custom-made to fit your feet perfectly, using state-of-the-art 3D printing technology to ensure a snug fit. The dynamic tuned arch design provides custom-positioned support in specific areas of the foot while remaining flexible in others, allowing for optimal energy transfer during cycling.
Additionally, these insoles come with a deep contoured heel cushion that provides all-day shock absorption and cushioning, relieving heel discomfort and preventing foot fatigue. The breathable fabric helps to keep your feet cool and sweat-free, making them perfect for intense cycling sessions. Overall, these durable and comfortable insoles are a great investment for any cycling enthusiast.
» Considering over-the-counter insoles? Compare custom orthotics vs OTC insoles
Transform Your Cycling Experience
If you're looking to enhance your performance, reduce your risk of injury, and transform your cycling experience from just an activity to something you truly enjoy, investing in custom orthotics is the way to go. With custom orthotics, the insoles are molded to fit your feet perfectly, providing the optimal support and cushioning you need to reach your potential on the bike.
So why settle for generic insoles when you can have a personalized solution that's tailored to your unique needs? Upgrade your cycling game with custom orthotics and see the difference for yourself.
Foot exercises5 Exercises for Morton's Neuroma: Alleviate Your Foot PainHave you ever felt like there's a pebble in your shoe when there's nothing there? This could be a symptom of Morton's Neuroma, a common foot condition that results in a thickening of the tissue around one of the nerves leading to your toes. This thickening can cause sharp, burning pain on the ball of your foot.
Morton’s Neuroma is typically caused by entrapment of the common digital plantar nerves as they pass between the long bones of the foot. This entrapment may be due to wearing narrow shoes or high heels, or engaging in repetitive activities like running and jumping that put pressure on the forefoot.
While treatment options for Morton's Neuroma range from activity modification and anti-inflammatory medications to more severe interventions such as corticosteroid injections or even surgery, there are exercises you can try at home that could help alleviate the pain.
5 Exercises for Morton's Neuroma
Standing Calf StretchFoot RollTowel CurlsPlantar Fascia StretchSeated Soleus Stretch
1. Standing Calf Stretch
The standing calf stretch exercise is designed to stretch and strengthen the muscles in your calf and foot. This improves foot mechanics and reduces stress on the ball of your foot.
Here's how to perform the standing calf stretch:
Stand facing a wall with your feet shoulder-width apart.Step forward with one foot and place it flat on the ground, keeping your other foot back.Lean forward slightly and place your hands on the wall at shoulder height.Keeping your back leg straight and your heel on the ground, bend your front knee and lean forward until you feel a stretch in your calf.Hold the stretch for 15-30 seconds, then release and repeat on the other side.Repeat this exercise several times a day, especially before and after any activities that put stress on the ball of your foot.
» Wondering what's causing forefoot pain? Find out here
2. Foot Roll
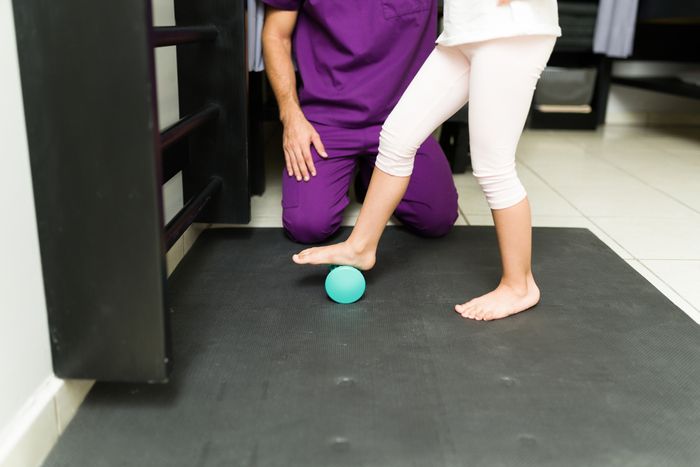
The foot roll exercise helps reduce foot pain and tension in the plantar fascia. Here's how to do it:
Sit in a chair and place a small ball, such as a tennis or golf ball, on the ground in front of you.Place your foot on top of the ball and gently roll the ball back and forth along the arch of your foot, applying as much pressure as you can tolerate.Roll the ball under your foot for 2-3 minutes, focusing on the arch and ball of your foot.Repeat the exercise with your other foot.
Did You Know?Morton's Neuroma commonly affects middle-aged women, and it is estimated that it occurs 8 to 10 times more often in women than in men. It is often associated with wearing high-heeled or tight shoes.
» Learn about the differences between Metatarsalgia and Morton's neuroma
3. Towel Curls
Towel Curls can strengthen the toe muscles and improve foot flexibility and balance. Here's how to do this exercise:
Sit in a chair with your toes pointing forwards and place a small towel on the ground in front of you.Place your foot on top of the towel and use your toes to pull the towel up towards you.Hold the position for a few seconds before releasing the towel.Repeat the exercise for a total of 10-15 repetitions. Switch to the other foot if necessary.
4. Plantar Fascia Stretch
This exercise reduces tension in the foot and alleviates pressure on the ball of the foot. Here's how to perform the plantar fascia stretch:
Sit in a chair and cross your affected foot over your other knee.Use your hand to pull your toes back towards your shin until you feel a stretch in the bottom of your foot.Hold the stretch for 15-30 seconds, then release.Repeat the stretch 2-3 times, then switch to your other foot.
5. Seated Soleus Stretch
The Seated Soleus Stretch is designed to alleviate pressure on the ball of your foot by stretching the soleus muscle in the calf. Here's how to perform it:
Sit in a chair and extend one leg out in front of you with the heel on the ground.Keeping your other foot flat on the floor, lean forward until you feel a stretch in the back of your calf.Hold the stretch for 15-30 seconds, then release and repeat on the other leg.
You can perform this stretch several times a day, especially before and after any activities that put stress on the ball of your foot.
Remember to Stretch!Before starting any exercise routine, it's essential to warm up. A good warm-up increases your heart rate, warms your muscles, and increases joint flexibility. This prepares your body for exercise and helps prevent injuries.
Ease Morton's Neuroma Pain
While Morton's neuroma can cause significant foot pain, there are a variety of exercises and treatments available to alleviate its symptoms. By incorporating these exercises into your daily routine, you could help reduce tension in your foot and alleviate pressure on the ball of the foot.
For additional support in managing Morton's neuroma, consider using products such as Upstep's custom orthotics. These provide customized support, shock absorption, and foot cushioning, reducing pressure on the ball of the foot and improving foot mechanics. If you're dealing with Morton's neuroma pain, exploring these orthotics could be a beneficial step in managing your foot pain.
KneeGet Back on Track: 6 Strengthening Exercises for Runner's KneeDoes your knee throb after a run? Is going downstairs a challenge due to persistent knee pain? You may be experiencing runner's knee, also known as patellofemoral pain syndrome (PFPS). PFPS, characterized by pain around or behind the kneecap, is often a result of overuse, muscle imbalances, weak thigh or hip muscles, or flat feet. Its telltale symptoms include discomfort while walking downstairs, sitting with bent knees, or—unsurprisingly—running.
While rest, ice, and physiotherapy can soothe the symptoms of PFPS, the key to truly overcoming this nagging condition lies in strengthening exercises. Of course, some exercises are better than others, and the right routine can bring you back to your active lifestyle very quickly.
6 Exercises for Runner's Knee
Here are six exercises that treat Runner’s knee by strengthening the muscles around the knee joint and improving overall stability and range of motion.
Donkey KicksClamshellsStraight Leg LiftStep-UpsLeg ExtensionsWall Slides
1. Donkey Kicks
Donkey kicks are a go-to exercise to strengthen the glutes, hips, and lower back muscles. Why does this matter? These muscles are responsible for stabilizing your knees, which in turn alleviates PFPS symptoms.
To perform the exercise, start on all fours with your wrists under your shoulders and your knees under your hips. Keeping your right knee bent at a 90-degree angle, raise your leg until your thigh is parallel to the ground. Lower your leg back down and repeat 15-20 times. Keep your core engaged and your back flat throughout the exercise. You can further modify the exercise by adding ankle weights.
2. Clamshells
Clamshells specifically target the hip muscles, improving the overall stability and balance in the lower body—crucial factors in managing the symptoms of runner's knee.
To perform the exercise, begin in a side-lying position with your legs bent at a 90-degree angle. Keep the leg to be exercised on top. Keep your feet and ankles together, and lift your top knee. Lower the knee slowly and repeat 10-15 times. You can increase the difficulty of the exercise by using a resistance band around your thighs. Also, you should avoid tilting your pelvis or rotating your hips during the motion.
3. Straight Leg Lift
The straight leg lift targets the quadriceps—those muscles at the front of your thigh. By strengthening your quads, you're fortifying the knee joint, improving stability, and helping to alleviate the symptoms of runner's knee.
Lie flat on your back with your legs straight and your toes pointing up toward the ceiling.Press the back of your knee down to tighten the muscles in the front of your thigh.Slowly lift your leg towards the ceiling, keeping it straight until it is at least 45 degrees off the ground.Hold the position for five seconds, then slowly lower your leg back to its starting position.Repeat for 10-15 repetitions.
4. Step-Ups
Step-ups strengthen the quadriceps, hamstrings, and glutes, alleviating the pressure on the knee.
To perform the exercise, start by standing in front of an elevated platform that is at most knee height (a stair or stepping stool) and place a foot on the step. Shift all your weight to this foot, pressing down through your heel to lift your body onto the step. Hold the position for about 15 seconds, keeping your foot off the ground and your knee bent at a 90-degree angle. Keep your core engaged and your back straight throughout the exercise. Slowly return to starting position and repeat 10-15 times.
5. Leg Extensions
Leg extensions can be performed as a bodyweight exercise or with the use of a resistance band. This exercise targets the quadriceps muscles and helps strengthen the knee joint.
Bodyweight Leg Extensions
Kneel on the floor with your toes pointed behind you. Keep your back straight, ensuring your body forms one straight line from your head to your knees. Pre-tension your knees by squeezing your quads and tightening your core. With your arms clenched by your side, lean back until you reach your limit, then hold this position for a second.Return to your starting position by tightening your quadriceps. Repeat as many times as possible.
Banded Leg Extensions
Wrap one end of the resistance band around the back leg of a chair or sturdy object.Sit on the chair and loop the other end of the band around your ankles, securing it in place. Keep your back straight, your knees at a 90-degree angle, and your feet flat on the floor.Slowly straighten your legs till you reach your limits.
6. Heel Wall Slides
Wall slides, while seemingly simple, are incredibly beneficial for those battling runner's knee.
To perform this exercise, lie on your back with your feet towards the wall. Place your unaffected leg against the wall, keeping only the sole in contact with the wall. Extend your affected leg with your heel against the wall, then slowly bend your knee and slide your heel down the wall as far as you can. Hold this position for 5 seconds, then use your unaffected foot to help lift your affected foot back to the starting position. Lower your unaffected foot back to its starting position. Repeat as many times as possible, maintaining proper form and engaging the quadriceps muscles throughout the movement.
Fitness Tip!Consider incorporating a warm-up and cool-down period into your running routine. These practices could help reduce the risk of knee injuries.
Stride to Recovery
Incorporating these exercises into your routine can be a game-changer for those suffering from runner's knee. They not only help alleviate pain but also fortify your knees against future injuries. That being said, remember that a comprehensive approach to managing PFPS often reaps the best results.
Consider additional supports, such as running custom orthotics. For instance, Upstep offers custom orthotics that provide targeted support, shock absorption, and improved leg alignment. This can alleviate pressure on the knee joint and offer relief from discomfort.
Keep moving, keep strengthening, and most importantly—keep running!